

Reaktion Academy
Reaktion’s Shoptimizer Module
For any products that you advertise on Google Shopping Ads or Meta Catalog Ads, Reaktion offers the ability to dynamically create and assign custom labels to your products. This will help you take your Shopping Ads to the next level by allocating your budget to the right products at the right time, using close to real-time product level performance data.
Reaktion’s Shoptimizer Module helps you create these custom labels from scratch or based on one of our pre-existing templates. This is done by generating a product label feed, which calculates and assigns the product labels that match your desired criteria. This feed can then be uploaded into your Google Merchant Center or Meta Ads, which will contain your additional product attributes.
To access the Shoptimizer module in Reaktion, please click this direct link.
Creating a Custom Label Feed
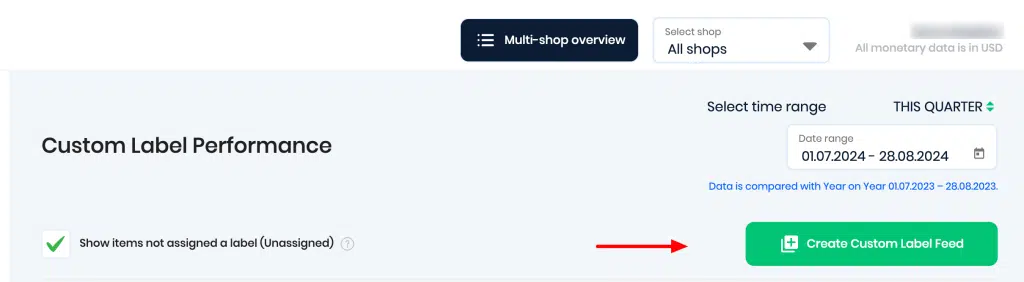
Step 1 – Create your custom label feed by clicking on the ‘Create Custom Label Feed’ button here –
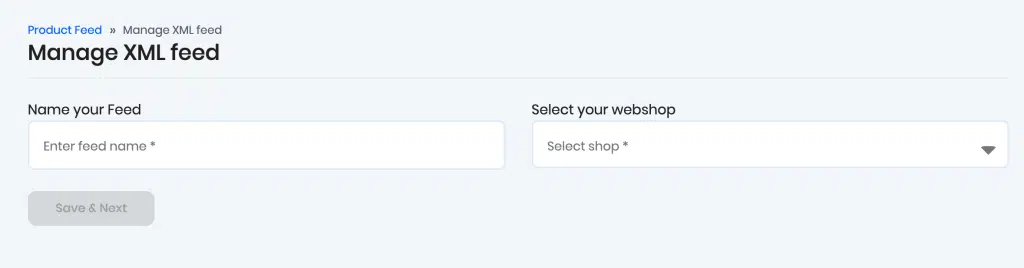
Step 2 – Enter your ‘Feed Name’. If you operate with multiple webshops/stores, select the desired webshop –
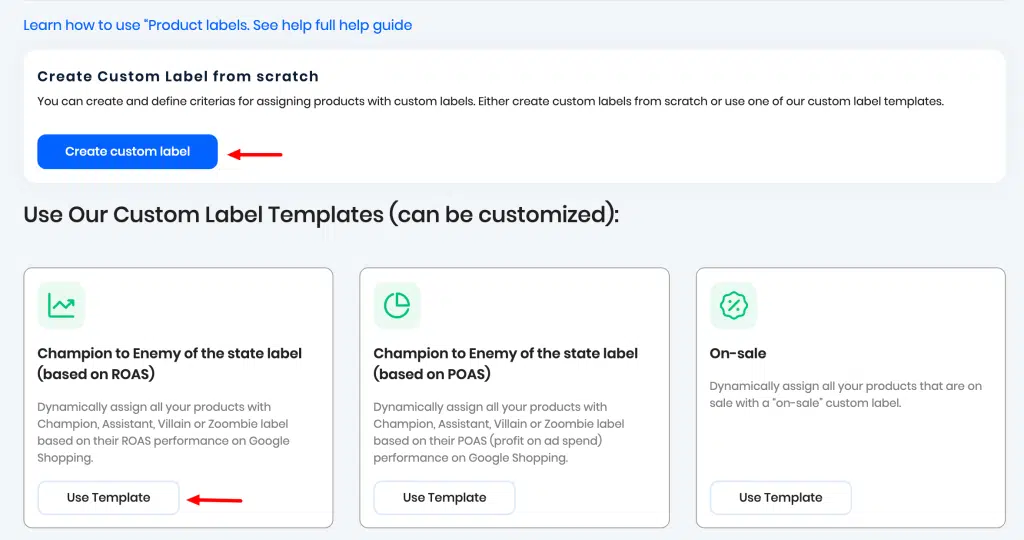
Step 3 – Choose between creating your own custom label from scratch or using one of Reaktion’s custom label templates (which are customizable)-
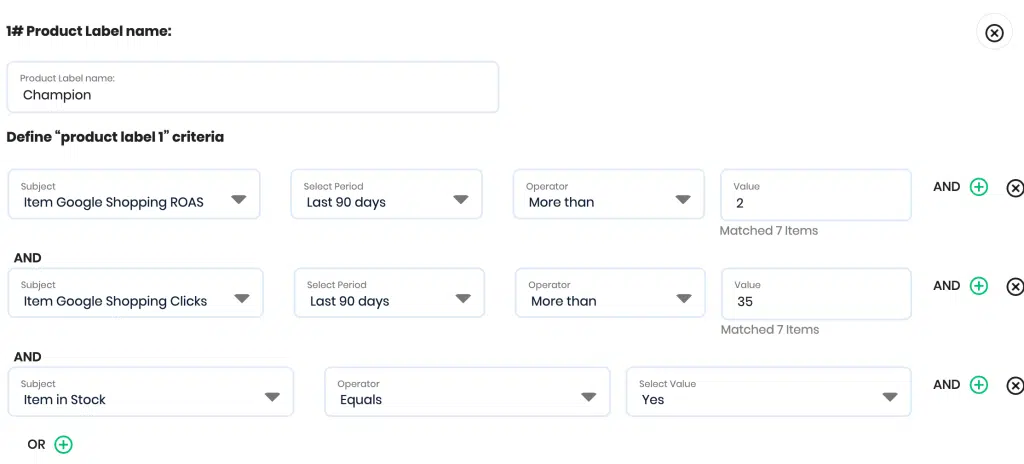
You can create and define criteria for assigning products with custom labels. You can choose to dynamically assign product labels to products that match your defined criteria. For example, you could categorise your products based on their ROAS and clicks into several performance categories:
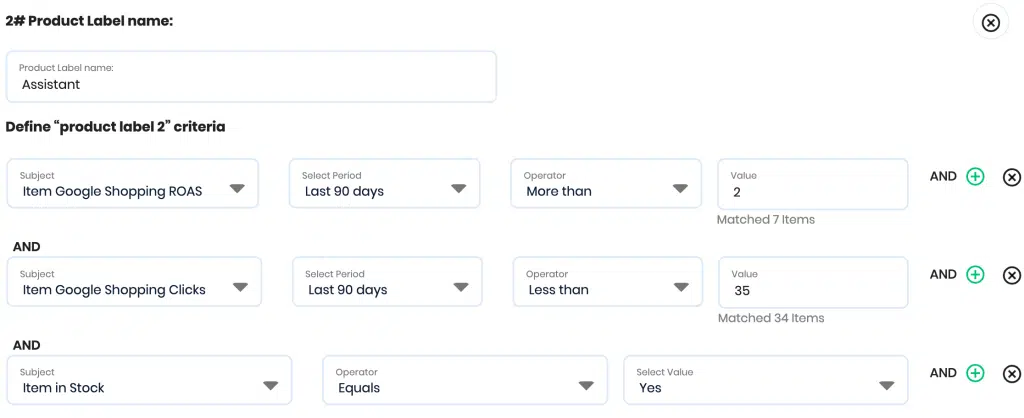
You can refer to Reaktion Product Marketing Report to access your product-level performance data the help you define how your product catalog should be segmented
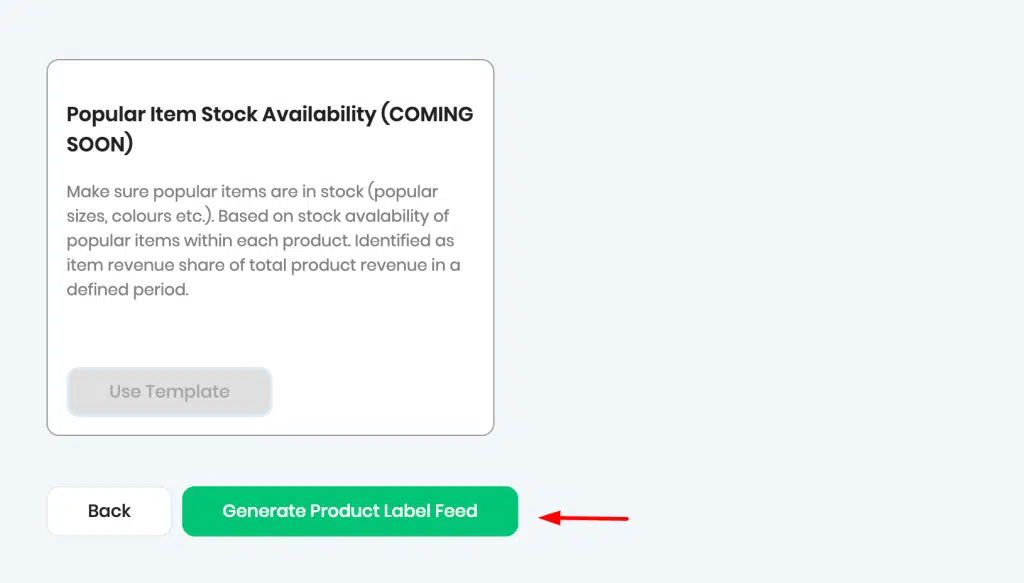
Step 4 – Once you have created your Product Label Group, click on ‘Generate Product Label Feed’ at the bottom of the screen –
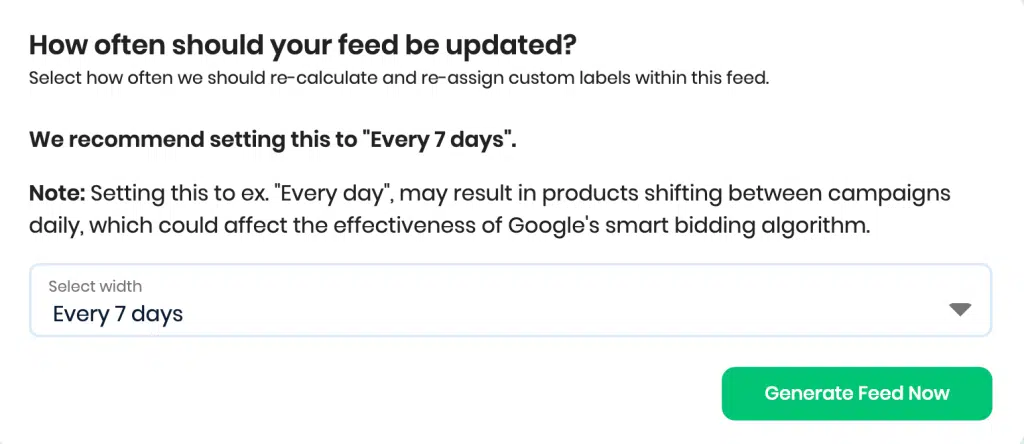
Step 5 – The final step is to choose how often would you prefer your feed to be updated. This defines how should we re-calculate and re-assign custom labels within this feed. Our recommendation is to set this to “Every 7 days” –
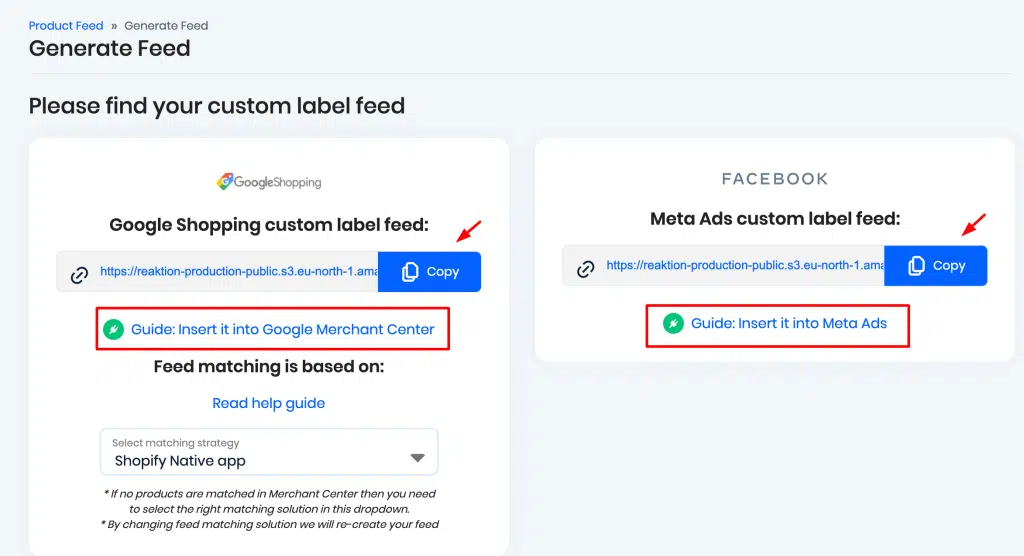
Once you have generated the custom label feed, you will find your feed link under the Google Shopping and Meta Ads sections as shown below, along with the Guide links on how to insert the feeds into Google Merchant Center/Meta Ads –
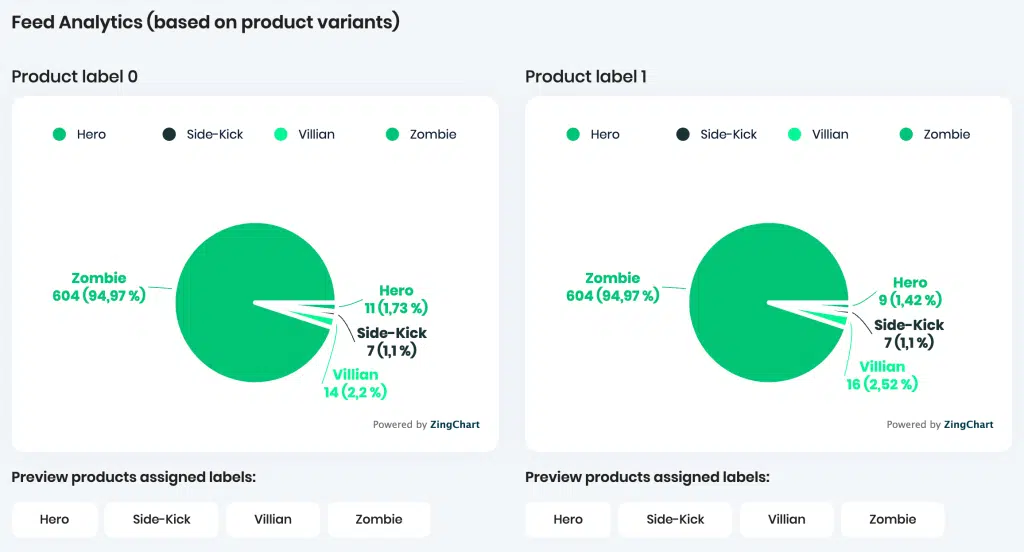
Scrolling down would also let you view the Feed Analytics section, where you can view the statistics of your product labels –
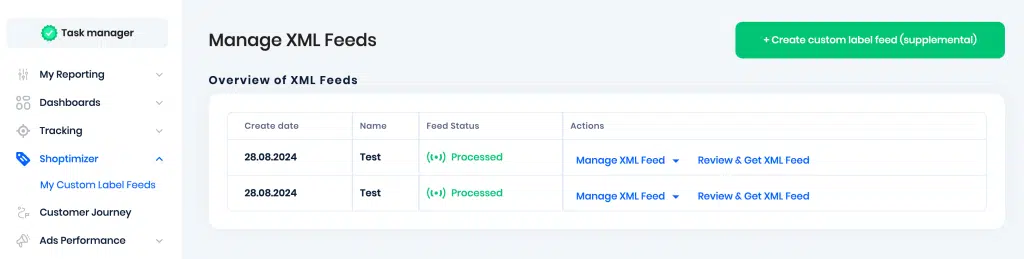
If you have created multiple custom label feeds, you can get an Overview of the various feeds, their status, editing and deleting options, etc by clicking on the ‘My Custom Label Feeds’ section in the sidebar –
Custom Label Performance
Once you have created your custom label feeds, you can view the performance metrics of the labels on the main Shoptimizer Dashboard –
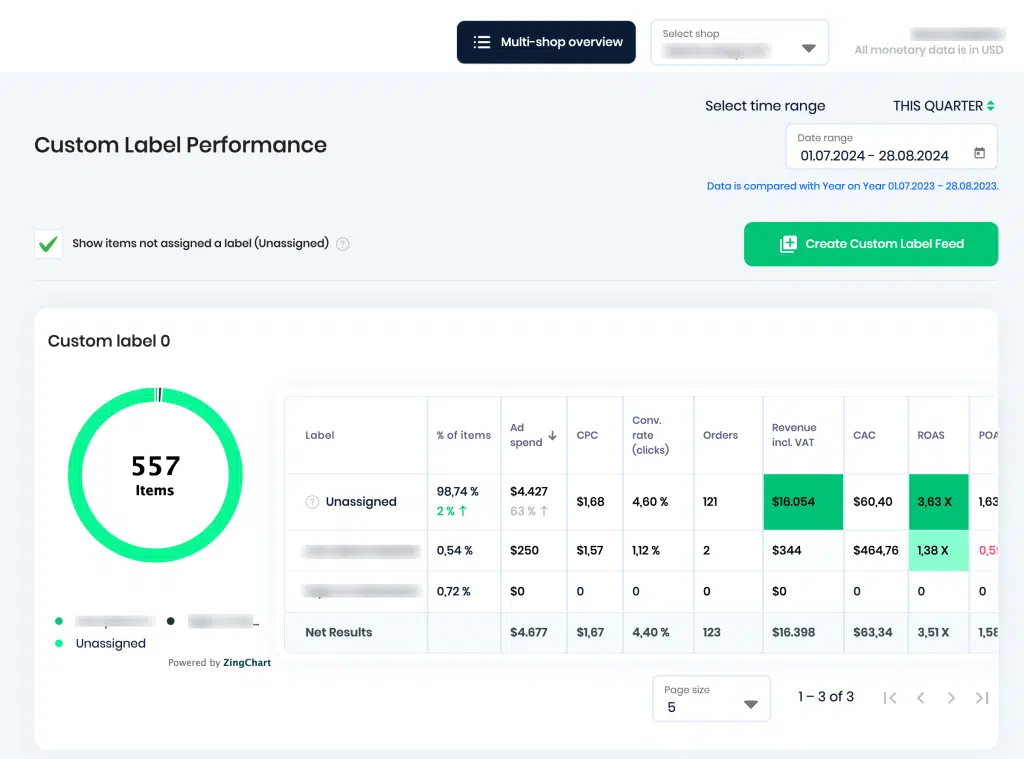
Please ensure that you have selected the right web shop and the desired time frame on the top right corner before viewing the data.
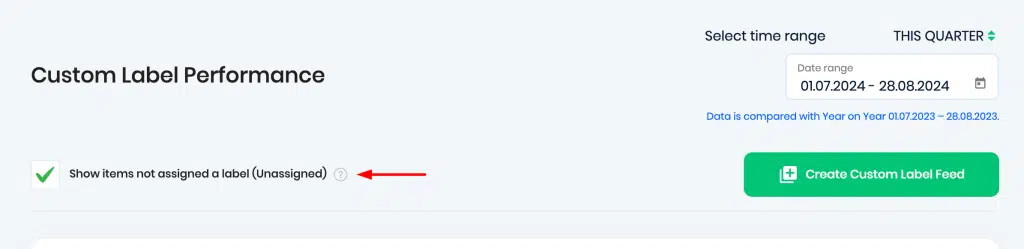
Unassigned Label – The items that do not match any of your custom labels fall under the ‘Unassigned’ Label category. For example, if you have 100 items in your entire XML feed. Now, you create a custom label with “all items on sale”. Then all the items that are not on sale will be excluded from the label and be unassigned, unless you create a custom label for them too. If you wish to view the ‘Unassigned’ label items, please enable this option –
Please refer to the articles below to learn more about:
How to upload a supplemental product label feed into Google Merchant Center Next
How to upload a supplemental feed into Meta Ads
How to select the correct Matching method for Product Variant IDs used in Merchant Center